
In this post, I’m going to go into the details of how to download and install AOSP on a modern macOS machine. The instructions on the official Android page are somewhat out-of-date, and aren’t as well-maintained as the Linux instructions.
1. Create a case-sensitive disk image:
Because Android requires a case-sensitive filesystem, we need to create a separate drive.
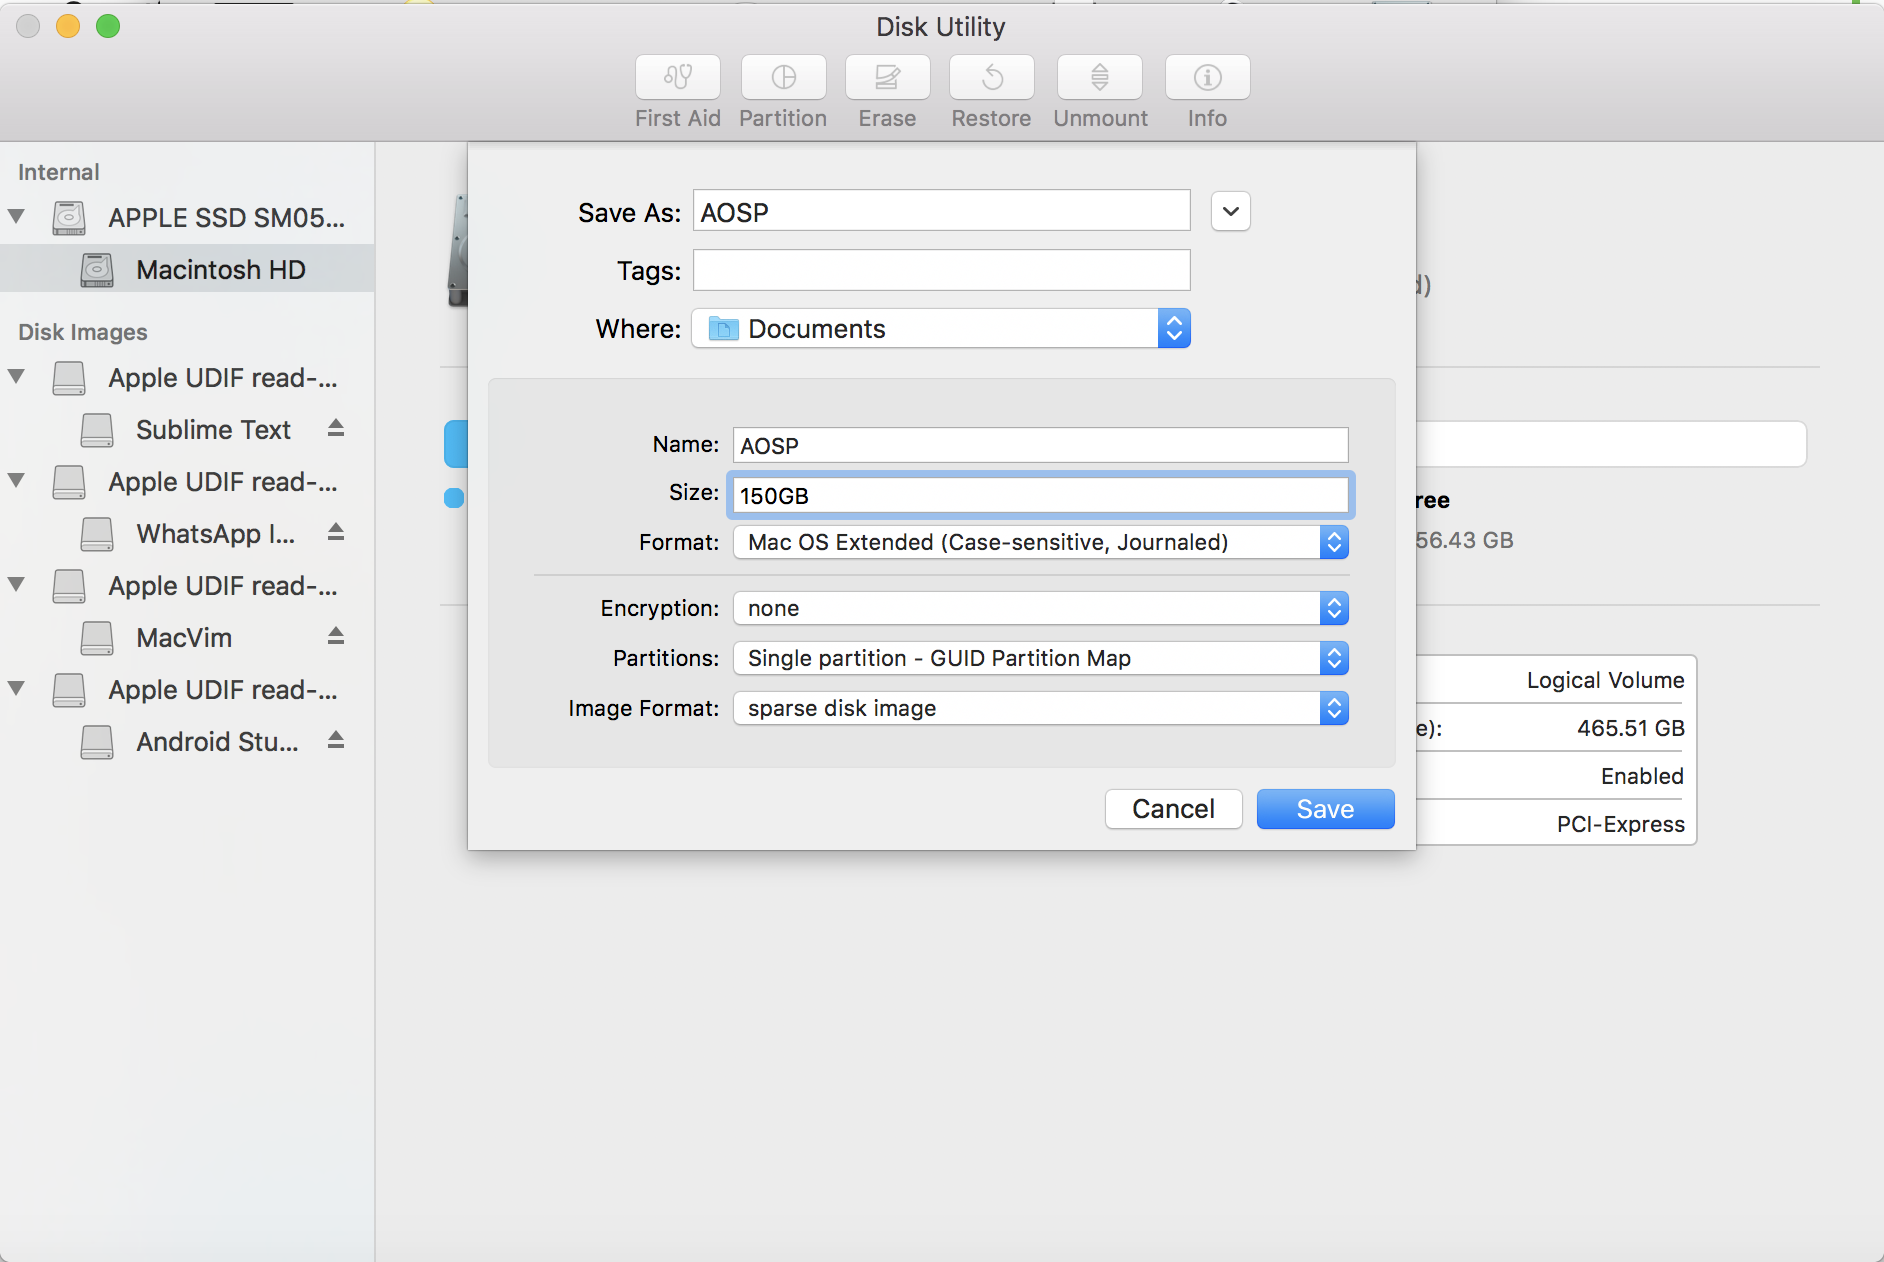
This was easy-peasy using the Disk Utility tool, the important thing here is that it must be case sensitive or nothing will build:
- Open Disk Utility
- Hit File -> New Image
- Name it and decide where you want it to live
- Choose the format “Mac OS Extended (Case- Sensitive, Journaled)
- Choose the image format “sparse disk image”
- Choose the size (I put 150GB here). Make sure if you change other settings that this setting doesn’t reset back to the default 100MB.
- Hit “Save”
After it’s done creating (should be super fast for a sparse image), verify that the new drive is indeed case-sensitive by hitting “info” on it

If it’s not (I had a bug in my old Mac and it kept creating a non case-sensitive image), run this command:
# hdiutil create -type SPARSE -fs 'Case-sensitive Journaled HFS+' -size 150g ~/AOSP.dmg
Notes about my process
- I used the Disk Utility UI tool. It seems to work just great! My old computer for some reason didn’t agree to create a case- sensitive image, but my new Mac running Sierra 10.12.3 seems to completely agree to this
- The official docs say to allocate 40GB, but that’s like… KitKat? When I tried 100GB it threw up from lack of space in the middle of building, so I went with 150GB. The final size after compiling is around 80GB but it’s possible that a sparse image is even more wasteful or that there are things created during build that are later cleaned up.
2. Install the JDK:
-
Install XCode command line tools:
xcode-select –install
-
Install Homebrew by running:
ruby -e “$(curl -fsSL https://raw.githubusercontent.com/Homebrew/install/master/install)"
-
Install these packages from Homebrew:
brew install automake
brew install sdl
brew install git
brew install gnupg
- Set the file descriptor limit:
Open bash_profile by typing
nano ~/.bash_profile
And add these two lines to it:
ulimit -S -n 1024
export PATH=~/bin:$PATH
(the second line is for later but might as well)
Your file should have these lines added so it would look something like this:
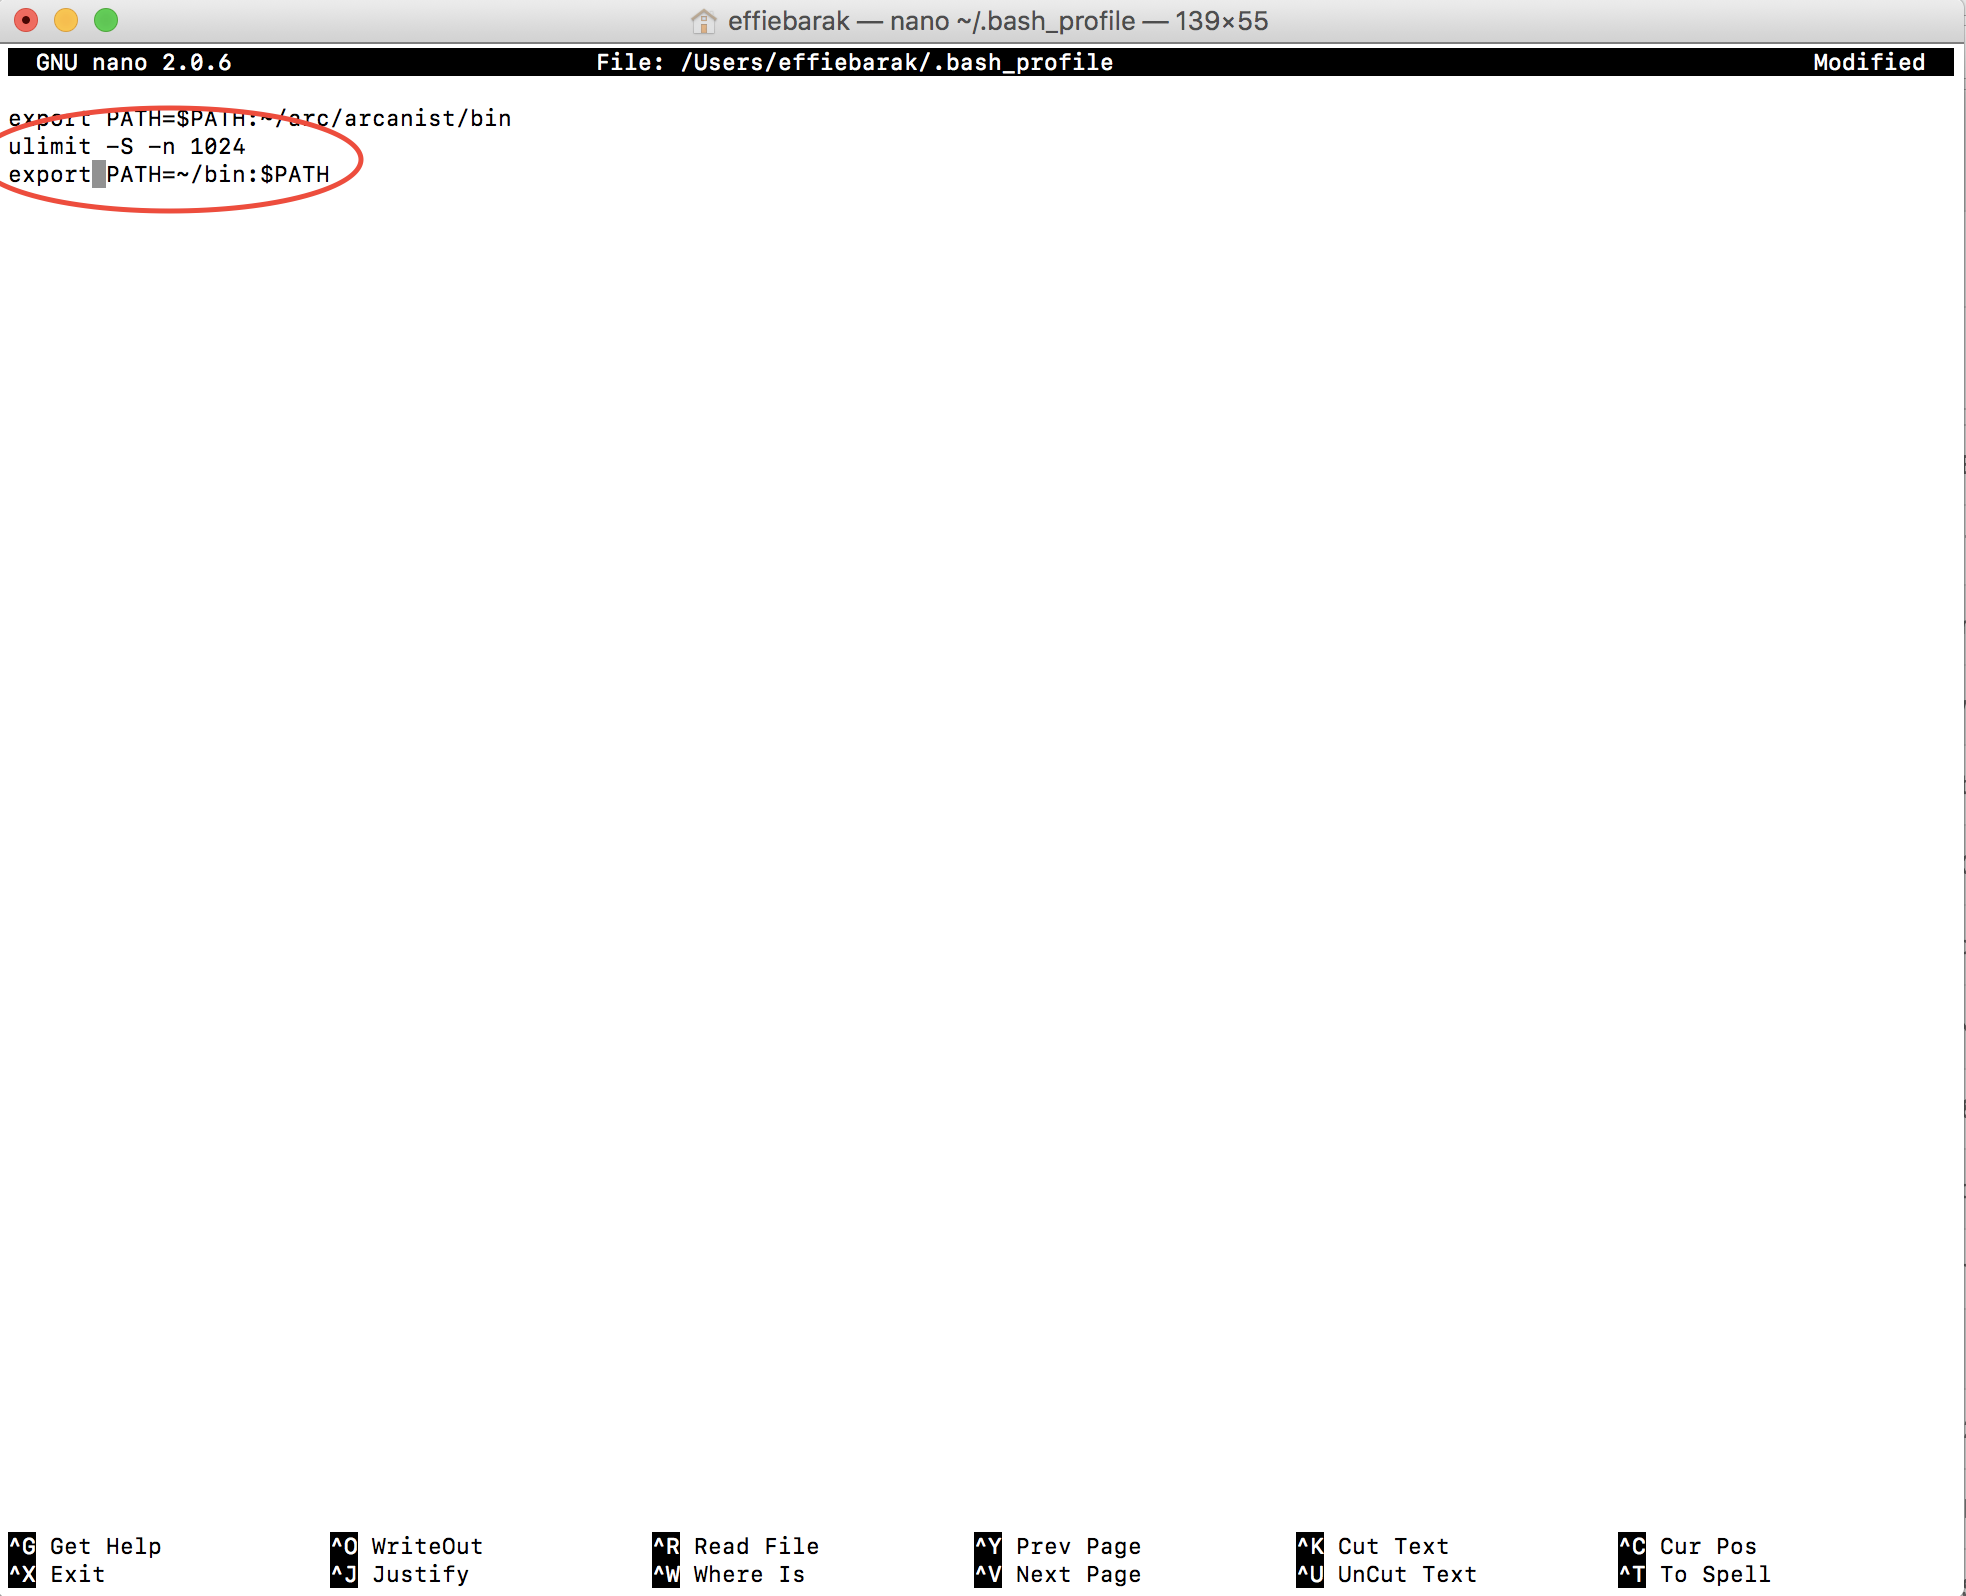
Save (by clicking ^O and enter to confirm the file name) and Exit (^X)
Notes about my process
I chose Homebrew to install / install packages from instead of MacPorts and switched the packages names accordingly, if you prefer MacPorts (or care), see the original instructions.
3. Download the Source:
-
Install the repo by running
mkdir ~/bin
curl https://storage.googleapis.com/git-repo-downloads/repo > ~/bin/repo
chmod a+x ~/bin/repo
-
Initialize a Repo client Navigate into the AOSP drive
cd /Volumes/AOSP
-
Make a directory for the code and go into it
mkdir android
cd android
-
Configure your user name and email (it has to be an email address that is connected with a registered Google account)
git config –global user.name “Your Name”
git config –global user.email “you@example.com”
-
Initialize the repo
repo init -u https://android.googlesource.com/platform/manifest
-
Choose which version of Android you want to sync (in my example, this is Nougat for Nexus 5X, Nexus 6P, Pixel XL, Pixel, Pixel C, a complete list can be found on the builds list
repo init -u https://android.googlesource.com/platform/manifest -b android-7.1.2_r8
-
Sync the repo
repo sync
Part 1 completed!
Great news, now all you have to do is wait ~30-60 minutes for the sync to complete, and you’ll have a local copy of AOSP!